|
I had fun this week exploring a different way to add colour to fabric - using a technique I haven't used for a long time.
Marbling!! It is such a gentle and interesting technique - floating colour onto a liquid or semi liquid surface, then pulling a mono print from it. Years ago, when I was a primary teacher, I remember the children in my class creating masses of beautiful paper by using oil based marbling inks. All that floating, dipping and dripping was great but messy fun. I think I probably ought to apologise to a lot of parents for sending their children home at the end of the day with marbled school uniforms too! Happy memories. 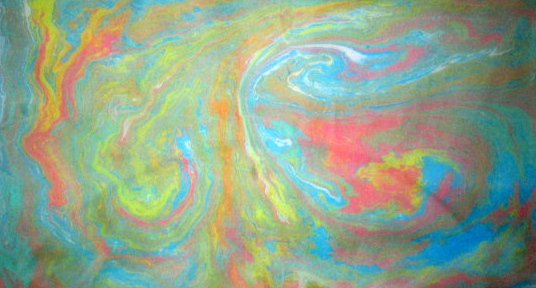
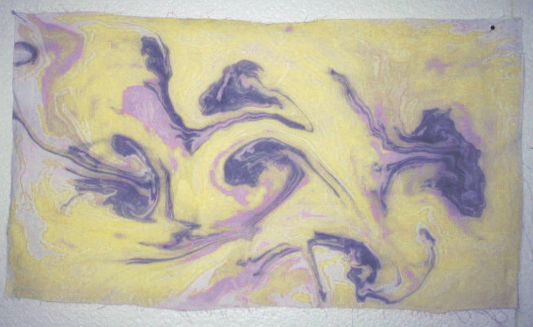
I went a bit crazy with this one and used almost all the colours from the kit!
My research into the marbling technique has led me to understand that there are several different approaches that can be taken. Oil Based Paints Oil based paints can be thinned and then simply dripped onto the surface of a tray of water. Because oil and water don't mix, the paint floats on the surface of the water. Different colours can be floated and variously stirred, gently blown or combed to produce different designs which can then be lifted off onto paper, fabric - or indeed any surface that will accept oil paint. Acrylic Based Paints Thinned acrylic based paints can also be used, but these need some special extra preparation as acrylic paint is water based and so wont float on water. To overcome this problem there are a few solutions: 1. Increase the viscoscity by thickening the water in some way. You could try - ordinary cornflour (cornstarch) https://www.forthemakers.com/tutorials/acrylic-paint-marbling - carrageenan (a product derived from red seaweed - remember the vegetarian gelli plates????) - methocel (a polymer derived from pine pulp) http://www.wetcanvas.com/forums/archive/index.php/t-883942.html 2. Adding a chemical to the paint to help it float more easily. You could try - Versatex http://www.dharmatrading.com/techniques/marbling-materials.html - Golden Acrylic Flow Release http://www.artdiscount.co.uk/golden-acrylic-flow-release.html - Ox gall (derived from the gall bladders of cattle http://marblingexplained.blogspot.co.nz/2012/03/ox-gall.html - Photo-Flo (a solution used by photographers who use old-school film) 3. Use something else that the paint will float on. You could try - shaving foam http://honestlywtf.com/diy/diy-paper-marbling/ (My mum gets amazing results from this method) 4. Use something else! You could try - nail varnish / polish http://vegetarianventures.com/2014/03/25/marbled-paper-diy/ - soy milk (remember the sun printing?) http://babbledabbledo.com/science-art-for-kids-marbled-milk-paper/
So that I didn't have to fuss about with a lot of processes I decided to try the oil based paint option - but I do like the sound of the soy milk, so when I have some time to spare I would like to try that out. If you have experience of this - or do try it out I would love to hear how it goes. As I don't already have any oil paints I decided to look for some online - and came across this small and inexpensive kit. I bought it expecting it to be the same as the oil based kits I used years ago in school, but it turned out to be much more interesting. Without realising, I had purchased a Japanese marbling kit, more correctly called Suminagashi (墨 流 し) or "floating ink" . Suminagashi originated in Japan as early as the 12th century and produces fine and delicate prints, somewhat unlike the robust and thick oily inks I used in the past. 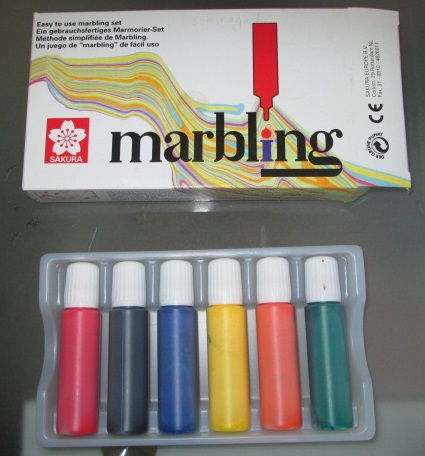
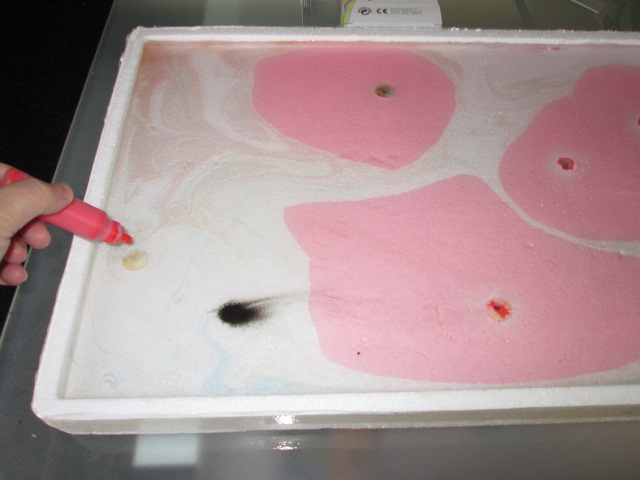
What I quickly learned is that these paints need a delicate hand as you apply them and no combs or rakes to make patterns with the ink, but rather a gentle blow over the water's surface to move the floating inks around. This is what I did: Step 1: I filled the lid of a large polystyrene box (known in New Zealand as a chilly bin) with about a centimetre or two of water and then dropped a few of the small paper circles from the box into the water. At first I didn't understand what the paper circles were for - but I quickly figured it out. The papers float on he surface of the water and you add single drops of paint onto them which stops the paints from sinking to the bottom of the tray. Interestingly the papers seem to leave no trace of their presence when you take the pint, and you simply keep adding drops of paint onto the same paper circle until you are ready for the next step.
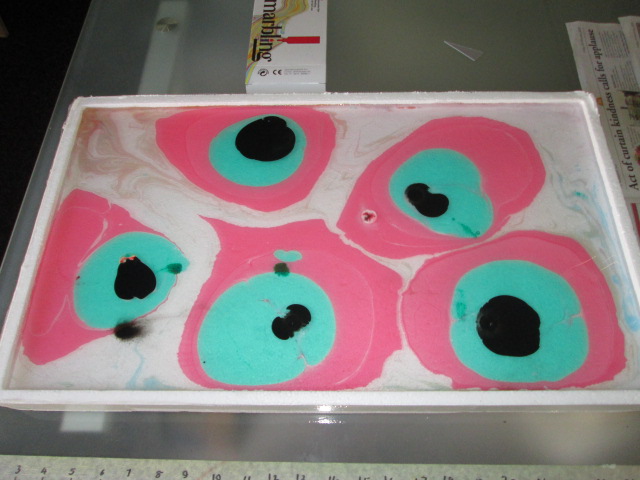
Step 2: More drops of paint are added to the water until you have an interesting assortment. This really is down to experimenting to see what you like. Here I went for something very simple. I could have taken a print from this which I think would have looked very striking, but I decided to move on to the next step to see what would happen.
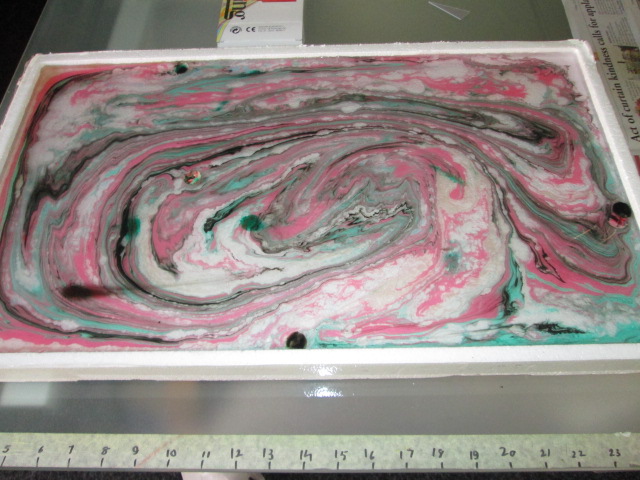
Step 3: I very gently blew across the surface of the water and magically the paint began to form swirls. This, apparently is the technique used by the Japanese artists who perfected this technique so long ago. I did attempt to use a rake, but the inks are so fine they simply reformed once the rake had passed through.
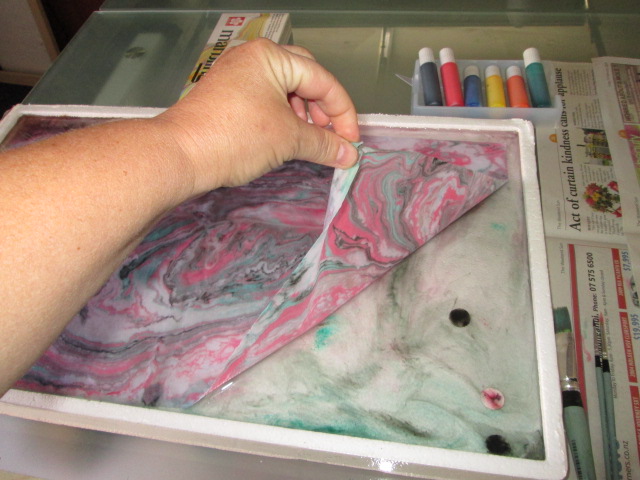
Step 4: I then took a piece of ever so slightly dampened fabric and laid it super gently onto the surface of the water. I learned the hard way that this is a very delicate moment. Even a tiny gust of air as you lower the fabric causes the paint to move - and if you aren't careful you end up with a great big empty space and therefore a big empty space on your printed fabric. (Having the fabric damp seemed to improve the takeup of ink to the fabric)
Step 5: I left the fabric on the surface of the water for a few seconds - until I could see the whole of the fabric had become wet. If an air bubbles occurred beneath the fabric (try not to get these) I gave it a gently poke with my finger to submerge the fabric. I then lifted the fabric up and off and instantly dropped it into a bucket of water. I was a bit worried about this at first, thinking I might was away all my lovely pattern - but fear not. Magically it stays put and just the excess is rinsed off. All you need to do then is allow the fabric to dry. It really couldn't be simpler. 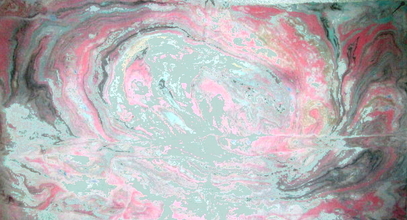
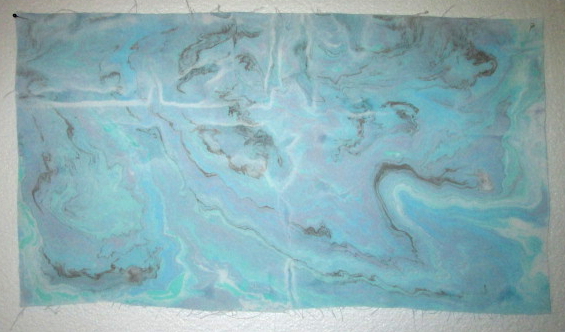
Pretty good, don't you think?
Now all I need to do is find aproject to use it all! Thanks for reading.
magret
5/4/2016 10:08:24 am
Thanks you for all the other ways to do the Marbling,
Claire
9/4/2016 08:38:28 am
Hi Magret Comments are closed.
|


|