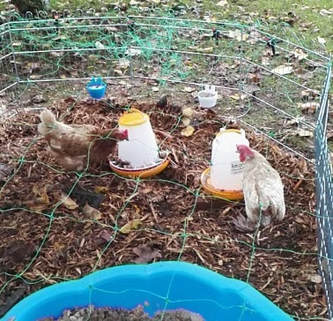
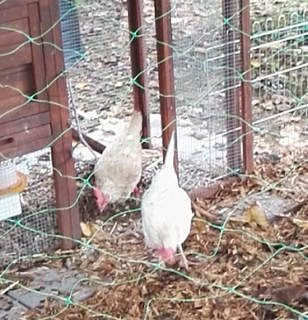
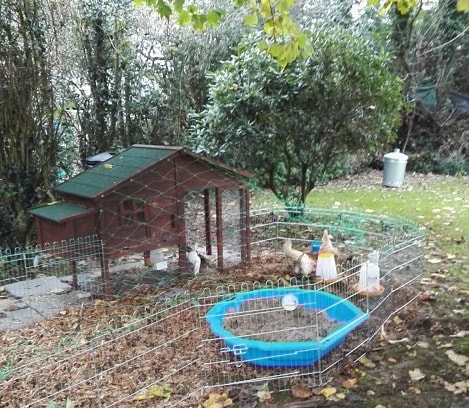
This week has been busy with all sorts of non textile related things - perhaps the most interesting of which was the arrival of 4 ex battery hens. I've been preparing for their arrival for a few weeks, and here they are.............
They have been a fun distraction - but I have also been determined to get myself organised in the studio so I can resume dyeing fabric once again. Dyeing fabric with fibre reactive dyes (sometimes referred to as Procion MX Dyes) is pretty straightforward once all the right 'stuff' gathered together. If all the things that can be pre-mixed are made up at and at hand it is a quick process. Late last week I began by gathering various containers ready to mix and keep the different solutions I generally use when dyeing. I raided the recycling bin for a nice big bucket with a lid, a large soft drink bottle, several small bottles with lids, a few jam jars and some yoghurt type pots and put them all into an old washing up bowl. 
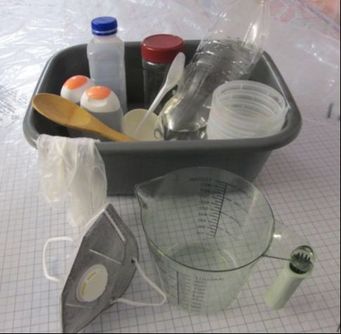
With all that ready I spent a very enjoyable day measuring and mixing the various chemicals so they are all ready when I need them. Before I carry on though, I need to say that I am not someone who dyes fabric by weighing and measuring precise amounts. I have tried to be exact, make notes, make samples, be disciplined; but after about ten minutes I have lost the plot and revert to mixing colours on the hoof with a bit of this and a few drops of that. I will never be able to exactly replicate a colour if I love it - or if I run out of fabric in that beautiful shade of crimson I dyed last week, but that's ok with me. I think I get more fun and a more exciting range of colours for my work by doing it this way. It is the way I like to do it - it isn't the only way, but I like to be a bit spontaneous and squirt colours together and try them out. But before I get to the dyes, I also need some other chemicals and solutions to be prepared. These are the 'recipes' I generally use for most of my dyeing work:
Urea Water: (also known as chemical water)
Mix together 8 tablespoons of urea in 1.5 litres of warm water in a bottle and shake until dissolved. It seems to keep indefinitely.
Soda Ash Solution: (also known as pH+)
Mix together 1 cup of soda ash and 4.5 litres of warm water in a big bucket. I give it a good stir with a wooden spoon until it is all dissolved, then put the lid on. It keeps for ever in my experience.
Sodium Alginate thickener: (also known as Manutex or kelp / seawaeed thickener)
Sprinkle 6 to 10g of sodium alginate onto 100ml liquid. You can use plain water, urea water or liquid dye, depending on the result you want. I usually make mine up with urea water. Whisk it together and leave to stand for at least 15 minutes. I put it into a jar and store it in the fridge. It keeps for a month or too before it goes stinky.
Fibre Reactive Dyes: (also known as Procion MX)
I like to make up small batches of dye (100ml to 200ml at a time) so that I have some ready to use at a moment's notice. I keep it in small bottles with the lids firmly closed. I label each colour so I know exactly which is which - sometimes the colours can be deceptive! I like to make up fairly concentrated dyes so I can dilute them if necessary. Some people believe the dyes 'go off' or lose their oomph once mixed, but I haven't found any issues with dyes I have made up and used even a month or so later. So long as there is no soda ash in the dye mixture they seem to last at least a few weeks - if not longer. I use 1 heaped teaspoon of dye powder and 2 teaspoons of salt for every 50ml of warm liquid for my concentrated dyes. The liquid is either urea water or plain water. It needs a lot of stirring to get the dye powders fully mixed and sometimes not all the powder will go into solution. I find yellow to be particularly difficult. If that is the case I usually use just plain water and which is just off boiling point. I dissolve the salt in that first, then allow it to cool a little until it is hand hot. Then I add the yellow dye powder and stir and stir and stir. Eventually most of the dye powder goes into suspension, but often settles out once the dye stands. I just give it a huge shake before using and that usually does the trick. Any tips on dealing yellow are much appreciated!!!
SAFETY FIRST:
1. Although not all the chemicals require you to wear gloves and/or a mask whilst you are handling them I find it is just easier to put them on whilst working with the various powders and not worry about forgetting to do so. That way you know you are covered! 2. Remember that any utensils or containers used with these chemicals should never be used for food use. Get yourself a collection of utensils and containers that you only use for dyeing - charity shops are great places to gather such stuff. 3. Label everything really clearly with the name of the contents and date - Manutex really stinks when it goes off! 
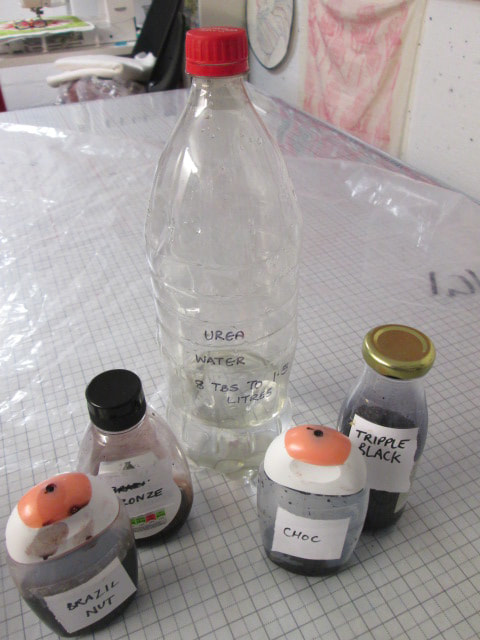
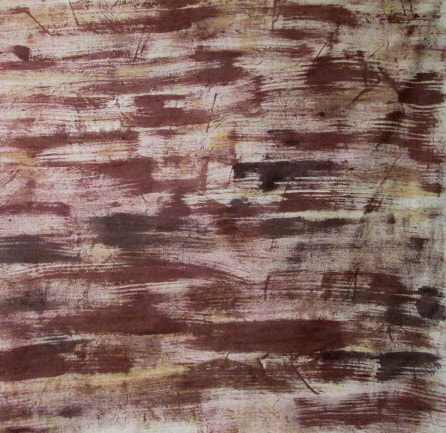
With all that prepared I will be able to dye any fabric I want in just a few minutes - with no need to get everything out and mix it all up from scratch (although sometimes that is nice to do too, especially if a big batch of something is required!) And finally.............starting work on a project at last!I need some 'wood-like' fabric. In 4 pots I mixed up some of the alginate paste with dye concentrate and soda ash solution - each pot has a different colour dye. Once the soda ash goes in the clock starts ticking! Around 4 hours is the advised time you have to work with the dye, although I find the working time lasts much longer in the cool British climate! 4 big paintbrushes and some bold brush strokes later - this was the result.
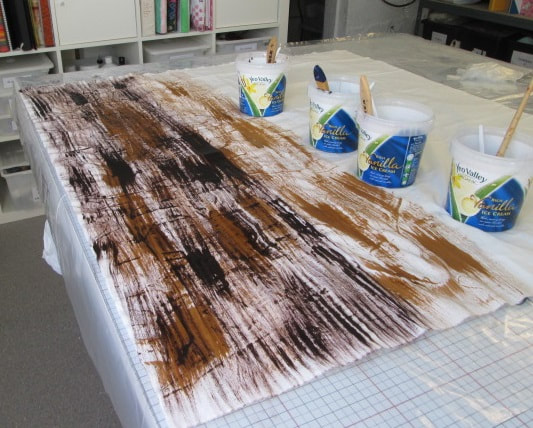
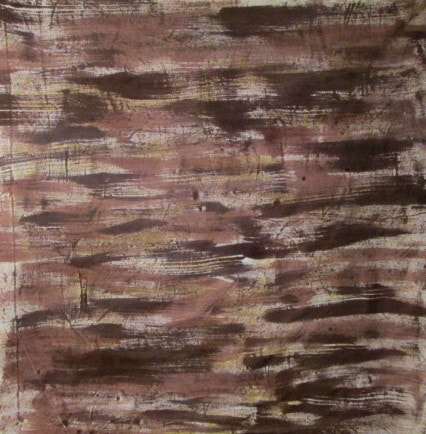
I made 3 large pieces of fabric, rolled them in a huge sheet of plastic and left them to sit in a warm room overnight (called batching).
In the morning I unrolled them, rinsed them in the sink with tepid water to get rid of the excess dye and then put them into the washing machine on a hot wash. And this is how they turned out.
So, now I need to figure out what to do with them next!
But while all that was going on, look what else happened.......................................
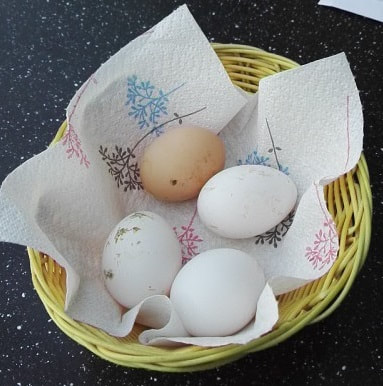
Thanks for reading.
I'll use them to dye some fabric.
To make the dye I started with about half a bucket full of dried flowers and added just enough cold water to cover them. They were very buoyant and I had to squish them down to get them to start absorbing the water. I left the bucket out in the sun all day to stew. The next day I let the sun warm it all up again then squished the whole lot though an old sieve. The flowers had completely broken down into a silky mush, but the water had taken on an incredibly dark red wine colour.
Before I added the fabric I decided to mordant it in the hope that I would get a better result. I didn't want to use anything toxic, so I chose to use vinegar. All I did was make a mixture of water and vinegar (1 part vinegar to 4 parts water) and simmer the white fabric in it for an hour. After 1 hour I left the fabric to cool in the solution and then squeezed it out ready to dye. If I had been scientific I would have tried a mordanted piece of fabric and a non mordanted piece to see the difference - but if I'm completely honest - I forgot.
As I had a lot of dye liquid I decided to see whether simmering the fabric in the dye would give a darker colour than simply leaving the fabric to soak in the in the sun. I cut the the squeezed out fabric into two and put one into my dye saucepan and simmered it for an hour then left it to cool overnight. The second piece I just put into the dye bucket and left it out in the sun.
The next day both pieces looked exactly the same. Finally I put them both into the washing machine and washed them in cold water with a little delicate washing liquid.
The photo above shows how the two pieces of fabric turned out. They are both almost identical (so there was no need to use any electricity to simmer the fabric at the end - and quite possibly I could have done without simmering the vinegar either - something to explore in the future) and have a very pretty pale pink with a hint of greyness. I suppose I could call it mink. I still have a piece of avocado dyed fabric from last year so I have included that in the photo too (on the right). That has a similar colour but has a little more brown in the pink. It actually goes very nicely with the hibiscus dyed fabric. (You can read the post about dyeing with avocado pits and skins by clicking here and here.
As delicate as the fabric is I think it needs a bit of a kick to create something a little more interesting - so I mixed up some procion to dye some more smaller pieces of fabric to co-ordinate. I used fuscia, golden yellow, charcoal, pewter, my current favourite, cobalt. And this is what I now have - I think it look great.
Thanks for reading.
I hope you will be as pleasantly surprised with the results of the avocado dyeing experiments I did last week. You can see the results below. After soaking overnight in the dye bath, I laundered the fabric and the result was a beautifully soft dusty pink (it is the fabric in the centre). The other wonderful thing is the fabric had the most lovely smell - a slightly perfumed citrussy freshness. I wish I could bottle it!
I think the 3 fabrics below look beautiful together don't you? - The original white, the avo dyed fabric and then the walnut dyed fabric I made a few months ago. Adding the iron after mordant
If you have ever tried working with indigo or wode then you will know about the magic that happens once the fabric comes out of the vat - well, a similar thing happens with avocado dyed fabric once it hits the iron after mordant. It is like magic!
I think the best way I can show you what happens is in pictures.............. I decided to try a folding technique and dip the dyed fabric into the iron after mordant to see what would happen. I folded the fabric following the instructions in this video https://www.youtube.com/watch?v=eTaAl4us8aY Once it was folded I poured the iron after mordant I made last week into a bowl and briefly dipped the edges of the fabric into it. As soon as I took the fabric out and the air hit the fabric it began to change colour. The whole reaction takes place in a matter of seconds, and the more of the iron mordant you add the darker the fabric becomes. I had not realised quite how strong or quick the reaction would be, and unfortunately on this occasion I think I rather overdid the dip! Still - it was a great learning experience, and next time I will be much more light handed. I have also experimented with other methods of applying the iron water by painting lines and dripping it onto the fabric. There is a lot of opportunity to experiment here.
Sadly the lovely smell is now gone, replaced instead with that curious metallic smell which reminds me of blood (that'll be the iron!) Still, it turned into a pretty interesting piece of fabric.
And to my friend k3n - you are absolutely right - 'saddened' is a very good adjective! (see the comment k3n left at the end of last weeks post) I Hope you have fun if you have a try. Thanks for reading!
All 3 trees are absolutely covered in the biggest avocados I have ever seen! I wished at that moment my nephew and niece were visiting - they are the best tree climbers I know and would have certainly been able to gather us armfuls of beautiful fruit. As they are not I had to make do with windfalls - but fortunately it was a breezy morning - and there were plenty of avos on the ground. Here are just a few which I collected - the dark ones are ready to eat, the bright green ones are now ripening in my fruit bowl. I also collected up all the very ripe and bird pecked fruits. (You'll see why soon!) The amazing thing about avos is that they are incredibly good for you - apparently a complete super food with the most amazing health benefits. When I got home I made my favourite snack - avo on toast. Yum! Read more about the wonders of avocados here:http://healthnfitnesshops.com/health-benefits-of-avocado.html/
Mine didn't look quite this beautiful - but I promise, it tasted just as good.
Of course, after my lunch I had a lot of avocado skin and big pips left over, and together with the spoiled ones I collected I put them all into my big pot on the stove. I'm sure you can guess what is coming next! Being not at all scientific, I covered it all with water, the simmered it all for an hour or so. Because the large avocado pips contain a lot of natural tannin I didn't worry about any mordant at this stage, (I am taking a direct dye approach here). Only time will tell whether this was a good idea or not! After a good long simmer to extract the natural pigments I then strained out the debris and added a large piece of pre- wetted white cotton fabric. At this stage the hot dye bath was a pale pinkish tea-like colour. Pretty, but not terribly promising. For good measure I simmered it again (with the lid on) for another half an hour, then turned off the heat and let the fabric sit in the cooling dye bath. Interestingly, as it cooled, the dye bath became darker - I'm thinking that perhaps it is oxidising - just like avos do when you cut them open. I don't know if that is actually what is going on, but it sort of makes sense. In the second picture below you can see I have put a plate on top of the fabric to keep it fully submerged. I'm going to leave it in the dye bath for a few days to see whether the fabric becomes any darker. There is one further thing I am going to try...... I have read that I can apply an aftermordant which will modify the colour of the avocado dyed fabric. For avocados an iron mordant is said to change the colour to a dark bluish purple, so I am preparing an iron mordant (also known as iron liquor) ready to try once I remove the fabric from the dye bath. To make the aftermordant I have put a few rolls of steel wool into an old milk carton and added a weak solution of vinegar and water. I intend to leave this for a few days to allow the steel wool to rust, thus creating an iron rich solution. This iron liquor can be stored indefinitely in a properly sealed and labelled bottle.
I'll finish the process this week and post my results next week - fingers crossed I will have some lovely fabric for a new idea I have for a quilted poem.
Thanks for reading.
COLOUR FEST
What the heck is Dismaland? Click here.
|
|