CLAIRE PASSMORE blog

Teaching online - the new normal?

23/8/2020

 
As is seems pop-up lock-downs and self isolation are going to be with us for a while yet I thought it was about time I did something positive, rather than just sitting back and waiting for the 'new normal' to arrive. So, after a lot of thinking and trialling different things I am about to start online classes. 

To begin with I am going to start with my tried and tested Sunflower Bowl class. 
Picture
Nesting sunflower bowl by Claire Passmore

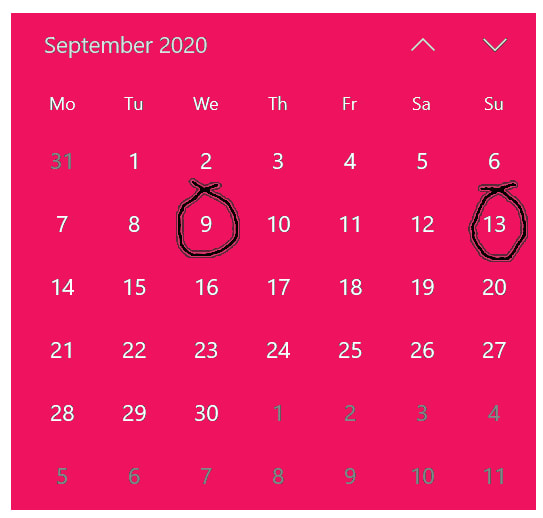
​This class is one of my favourites and will definitely be suitable for online teaching. I have tried a few online classes myself lately and unfortunately not all of them have been terribly satisfactory, ok maybe, but not the best. So I wanted to make sure that the classes I teach online are ones which will work and give everyone who participates an enjoyable time and leave them feeling it was worthwhile. 

After the success of the 12 Days of Christmas Block-a-Month class I taught last year I am once again teaming up with the lovely people at Midsomer Quilting to offer this class to individuals. It will be a live one-day class with demos by me along with friendly chat, lots of questions and answers and a few laughs along the way. There are two dates on offer next month - Wednesday 9th September and Sunday 13th September - so not too long to wait either! I'm limiting it to 10 participants per class to make sure that everyone has a chance to talk and ask questions and we can keep it as friendly as possible.

Picture
Picture

​The classes will work like this:
It is important to note that this is not a sew-along class. I will be demonstrating the step-by-step process of creating the sunflower bowl from fabric and stiff interfacing. You will then make the bowl in your own time, either the same day or at some time in the future.

The class will be taught using the Zoom platform and will be recorded. All participants will receive a copy of the recordings as soon as possible after the demos, (hopefully there will only be a 20 minute or so delay to allow for uploading)  which you can watch as many times as you wish. (But please note, after two weeks the recordings will expire on the server.)

The class will be broken into 3 sessions, all  on the same day, so nobody gets square eyes. There will be 2 sessions in the morning (with a built in tea break) and 1 at the end of the day, to give everyone a chance to review what they have done. It will also be an opportunity to share (if you wish) and to ask any more questions, swap ideas and maybe even set up a closed Facebook /Whatsapp group. 

On the date you choose you will join the Zoom class (starting at 10am) and watch me demonstrating live. You will be able to interact with me and other participants, asking questions as I work. It will be a fun and relaxed class, not quite like being in the same room as everyone else, but the next best virus-free thing!
The only thing I ask of you is that you know how to join the Zoom class (you click on a link in an email I send you) and to be able to mute and un-mute yourself. Its pretty straightforward. 

More details of how the day will run can be found in a booklet I have drawn up which you can view by clicking on the black button below.
Online flower bowl class booklet
Picture
If this sounds like something that you would like to try then please visit the Midsomer Quilting website and book you place. (Link to booking page below). De from Midsomer has also very kindly put together a kit for us that has the fabric, freezer paper and interfacing that you need to make the set of sunflower bowls which can be bought online for £12 (inc p&p) from their website. De will post it out to you in time for your class. However, the kit  is not a requirement, so if you already have what you need you can use that instead (Requirements list is in the booklet). 

A link to the class booking page on the Midsomer Quilting website is below. You can also order your kit here too if you decide to purchase one:
https://midsomerq.com/collections/workshops/products/nesting-flower-bowls-with-claire-passmore-june-13th-10am-to-4pm-sewing-machine-required?variant=31721283584023
​​
Picture

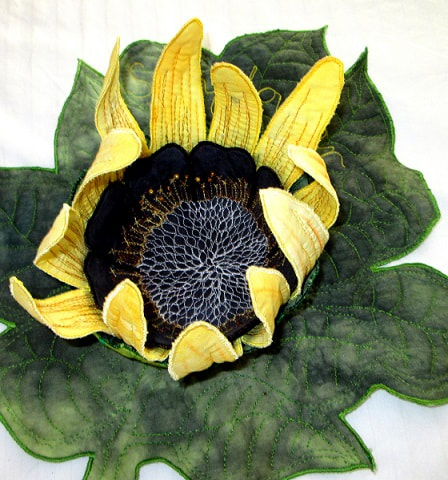
If this is a success, and I don't see why it wont be, then I will look at converting some of my other classes into online events, so watch this space!

If your Guild or group would be interested in this as a full day class then please do get in touch and we can plan together how to get back to enjoying ourselves again. 

Thanks for reading.
Picture

Printing with lino blocks

16/8/2016

 
If you went to Festival of Quilts, I hope you had a lovely time. As usual there was lots of excellent work to see, old and new friends to meet, and a hint of controversy too. 
My mum and I spent a great weekend together and came away with lots of ideas and a little bit of shopping too. One of our favourite galleries was that belonging to Russian artist Lyubov Lezhanina. (Click on her name for a link to her Facebook page). It was tucked away right in the back corner, so if you didn't get down there, here are some photographs of her wonderful work.


And now back to work....
​
On October 2nd I have a new 'Further Techniques' workshop coming up at Midsomer Quilting where we will be taking a more considered approach to some of the ideas used in the original 'Techniques 1' workshop. The aim of the new workshop is to add surface design to large pieces of fabric in order to  create a co-ordinated collection that can be used to create a unique art quilt.  

​
One of my favourite ways to create interest on fabric is to print, and there are so many ways. For the workshop, amongst other things, we will be making hand carved lino blocks. They are reasonably easy to create and are make beautiful graphic marks on fabric. To give you an idea,  this morning  I decided to start a new block based on a moth that flew in through the window last night. 

After looking carefully at it I did a quick search and discovered it is a Pale Shouldered Brocade, Lacanobia thalassina. It is beautiful, don't you think? 
Picture

Not only is is an interesting little creature to look at, it is also a very simple shape with some interesting marks which will transfer nicely as a lino block. 

To start the block I made a very simple drawing of the shapes I wanted to carve. You can see that there is no detail here - just the outlines of some vaguely moth shaped creatures and some lines giving the idea of movement. (Please ignore the faint beetle and ant shapes in pencil - this is a recylced piece of paper and they have nothing to do with the moths)
Picture

This is what I intend to carve into the piece of 'lino' (I like to use a soft plastic type material as a substitute for lino as it is much easier to cut into and doesn't crumble like lino can if it gets cold or dries out). The moth shapes will remain whole on the block and the lino material all around them will be carved away.

Using a very soft pencil I traced the outlines then transferred them onto the lino block, ready to carve.
​
Picture

You can see the smudgy pencil outlines of the moth shapes and also see where I have started to carve into the block, taking out the green plastic material with the cutting blade. However, it is already starting to get a little confusing as to what should be carved away and what should remain, so I took a black marker pen and coloured in all the areas I want to stay. That way I hope I wont make any mistakes and carve out a section that should stay. Once it is gone, it is gone and there isn't a lot that can be done!
​
Lino printing block Claire Passmore

I hope this photo makes it all clearer. The black sections will be left alone for the time being, and all the green areas need to be carved away with the cutting tool. All those little grooves that remain in the carved away section produce beautiful graphic marks on your prints, so don't try and make it all super smooth.

SAFETY FIRST: If you try this then you MUST only ever carve away from yourself. That blade is super sharp and not only does it really hurt when you slip and stick it into yourself, it goes in deeply too and there will be a lot of blood and maybe tears. You need quite a lot of pressure to carve into the lino so accidents, which do happen, are not nice. 

Make sure the hand which is holding the lino block is never in front of the hand holding the carving tool. Although this sounds obvious, it is easy to forget and let that free hand hold the block in such a way as to almost guarantee you will get cut. Turn the lino block often to make sure you are always cutting away from yourself and your free hand. 
​

Picture

It took about half an hour to carefully carve away all the green material around the black shapes, and the block was ready to have its first trial to see what else was needed to add interest. Using a roller and some printing ink I inked up the block and made a trial print onto a piece of scrap paper. Unfortunately I forgot to take a photo of this very first print, but once I could see how it looked I wiped the block clean with a tissue and carved a little more removing areas where I wanted more definition and where I wanted more detail. This is the print I made next.

Picture
You can see it is not a good print, but the purpose of this one was simply to see how the extra detail I added looked. The moth on the right was looking more like a wasp with the marks I carved into the wing sections - so I knew I needed to cut some more into that area to sort out that problem. But I do like the small straight lines I made in the body of the moth on the left.

After that I made a further trial print. The photo below shows this and the ink and roller I used to ink up the lino block. Again, it is a terrible print, but it showed me enough detail of the marks I had cut into the lino. I still don't like the waspy looking one though. Those lines on the wings are all wrong. I'll have to work on that some more.
​
Lino print for surface design by Claire Passmore
Here is the finished block - still a bit wet after washing off the ink under the tap.
Picture
Picture
And here are two of the early prints in my sketchbook. I have added a little colour to the one on the left with Markal oilstick. I had intended working onto it with watercolour paint and pencils - but I have discovered that the new ink I have purchased is not permanent once dry and so is pretty useless for my purposes! Aagh!! The moment any water touches the print the black ink smears all over the place and not only ruins the print, but turns everything black. So choose your ink carefully, or use acrylic paint which also works well, and is permanent once dry.

I will work on this block some more, make some better prints and then print up some nice fabric to share in a few weeks time. If you decide to have a try at lino cutting, and it is great fun, please do take care. Put your work onto a non-slip mat or a whole newspaper (to protect your table in case of slips) and remember to keep your free hand behind the cutting tool!

Thanks for reading. 
​
Please feel free to share my website or blog with your friends by using the buttons to the right. If you would like to receive an e mail each time I post a new blog, please click here. I promise to never send you junk or give your address to anybody else.
 
Click to set cu stom HTML

Trying out a new stabilising product: Terial Magic

23/11/2015

 
I was at Midsomer Quilting last week, teaching my 'Doodle Birds' workshop (more on that later) and was given a present by De - a new product to try out. It is called 'Terial Magic', and I must admit, I had never heard of it until now.

Terial Magic is a slightly sticky liquid that comes in an easy to use spray bottle. According to the instructions it needs to be sprayed onto fabric and allowed to dry naturally for 15 or so minutes, and then ironed.

Once dry it is supposed to make the fabric stiff (like when you use starch) and non fraying. Stiff enough, it is claimed, that no further stabiliser is required for things like machine embroidery or 3D work.

Picture
Trying out Terial Magic

To see how it worked I took a few pieces of cotton quilting fabric from my scraps bag and sprayed them until they were moist. Following the demonstration on the Terial Magic website (click here) I put my fabric into a small tub and sprayed it. Once it was quite moist I squished it about a bit to make sure the liquid had penetrated throughout the whole piece, and then squeezed out the excess liquid (I put this back into my bottle).

Picture
Spray the dry fabric with Terial Magic in a small bowl until saturated
Picture
Squeeze out the excess slightly sticky liquid. I put this back into my bottle

After smoothing it out I left it to air dry on a flat surface for the 15 minutes stated. After this time it was still very wet - it was a winter's day in the UK, so not very warm - so I left it for around another 20 minutes of so, by which time it was only just damp. Obviously the temperature plays an important part in this, so use your judgment.
NOTE:At this stage the fabric was slightly stiff, but not noticeably different to when I had started.

I then took the fabric pieces and ironed them, as per the instructions. I used a hot  iron directly on the fabric (no ironing sheet) and the heat obviously had an effect, as the fabrics became smooth, very crisp and stiff. There was no residue on the iron and no flakes or 'gunge' on the fabric. 
Picture
Pressing the damp fabric with a hot iron. It became very crisp - like a piece of thin card

Comparison with starch

Up to this point I was starting to wonder why I would use this product instead of starch. I do not often use starch on my fabric, but when I do I usually mix my own and apply it in the same way.

I applied the homemade spray starch to the fabric in the same way as I did the Terial Magic and left it to dry until just damp and  then ironed the fabric. It was slightly stiff, but nowhere near as stiff as with the Terial Magic.
To try and get a stiffer result I sprayed the fabric once again with the starch mixture, but this time I ironed it dry straight away. This made a big difference and the fabric now had very similar crispness and stiffness to the Terial Magic soaked fabric. 

There were, however, two things I noticed which were slightly different when using the starch.
1. Small flakey particles of starch came to the surface of the fabric, which easily scorched
2. The sole plate on my iron got covered in a thin film of starch, which also scorched. Not the end of the world, but it meant I had to clean the sole plate of my iron which is always a pain.


My spray starch recipe:

50ml tap water
200ml  hot water

1 to 3 teaspoons of cornflour

Mix the cornflour and the
cold water to a smooth paste.
Add the hot water and whisk / shake until well mixed.
Pour into a spray bottle.

​According to the blurb that comes with Terial Magic these are two of the drawbacks of using starch. Another thing they mention is that insects like to eat the starch and therefore your fabric. I must say that I have never noticed this, but I am not a regular 'starch user'(!) so I am not able to say whether this is an issue or not. They also say the stiffener in Terial Magic is not edible by insects - so if this is important to you it may influence your choice.

What to do with this stiffened fabric

​The stiffened fabric was interesting.
It folds crisply - just like thin card, so if you have a project that needs firm creases or needs to stand without support this may be a good product to use. 

I tried a few origami ideas...​
Picture
This is a single layer of fabric folded to make a star
Picture
A single layer of fabric folded to make a dress. Next to it is a banknote I was once given, also folded into a dress shape
Picture
Folded hexie yoyo - easy once you have got the hang of it! (trouble is it took me an hour to get the hang if it)
The crispness of the fabric made it perfect for folding techniques. I can imagine it would also be particularly good when piecing small, fiddly shapes or pieces cut on a bias.

Origami links for the above 
For the folded dress, click here
For the yo-yo hexie, click here


​Next I tried some needle turn applique
Picture
1. The stiff fabric was easy to cut. I chose this fabric as it was particularly bad at fraying prior to treatment
Picture
4. The needle and thread slipped through the fabric easily - it was a pleasure to stitch
Picture
6. Fabric soaked in starch - cut well and no noticeable fraying
Picture
2. After cutting I finger pressed the seam allowance over. The crease stayed perfectly


The green fabric stiffened with the Terrial Magic did not fray at all and was very easy to stitch. I was pleased to note that there was no resistance to the needle from the product in the fabric


To make a fair comparison I repeated the process with a piece of yellow fabric soaked in starch. It cut well and creased well, just the same as the Terial Magic soaked fabric. The only difference I noticed was that when I came to stitch the needle and thread were not at all easy to pass through the fabric. It was much more difficult and made hard work of a simple job.
Picture
3. I pinned the leaf shape in place ready to stitch down
Picture
5. The finished leaf shape stitched down
Picture
7. The two leaf shapes; the green fabric was easy to stitch, the yellow much more difficult.

And then I tried stitching some raw edged leave to a piece of fabric
​​
Picture
Holly leaf shapes cut from Terial Magic soaked fabric
Picture
Place 12 in a circle, and stitch down the centre of each leaf. It looks better in real life than this photo!
The stiffness of the leaves made it easy to position them on the fabric and the raw edges, once again, did not fray.

The blurb also says you can use the stiffened fabric for machine embroidery without and further stabiliser. As I don't have an embroidery unit I can't let you know about that - but if anyone does and has experience of this product it would be good to find out if the claims are true. 

So - do I like Terial Magic? Yes, I think I do. It is similar to starch, but has a nicer feel, doesn't gunk up my iron and the treated fabric is nicer to stitch. I don't often need fabric that is stiff or crisp, but when I do I think this product would be a useful addition to the tools I already use. Thanks De - when I run out I will be buying another bottle from you!


Now for those Doodle birds!
These are a few pictures I took during the workshop at Midsomer quilting last weekend. Brilliant aren't they?

And how about these two amazing Doodle Poodles?  My thanks to Chris D who was so inspired when she got home that she made these two fantastic pieces. I just love them! Thanks for sharing them, Chris, I think you have cracked free motion quilting!
Picture
Picture
I hope you have enjoyed seeing all this brilliant free motion work. Thanks for looking.
​
Please feel free to share my website or blog with your friends by using the buttons to the right. If you would like to receive an e mail each time I post a new blog, please click here. I promise to never send you junk or give your address to anybody else.

Beautiful flowers - in fabric

2/11/2015


Nesting flower bowls - they just keep getting more beautiful

Picture
Picture
Flower Power!
Picture
It has been flower power all the way form me this past week.

It started on Wednesday 
with the ladies from the Wiltshire Guild of Spinners, Weavers and Quilters  in Steeple Ashton
Claire Passmore flower bowl workshop
As you can see - everyone was hard at work.
Then on Saturday and Sunday I was at Midsomer Quilting - creating even more fabulous flowers. I think we made enough to fill a whole florists, and not only that - we can all smile and know that the future of quilting is going to continue. The age range of the people at the workshops this week spanned from age 9 to ............... well, more than 21!
Claire Passmore flower bowl workshop
On Saturday poppies were very popular, but a sunflower, a little waterlily and a poinsettia also snuck in.
Claire Passmore flower bowl workshop
Then on Sunday waterlilies stole the show... with another sunflower, and a few poppies in the mix.
I think you will agree - they all look amazing. What I love the most is that no two bowls look the same. There are so many ways they can be varied; just by changing the colour from yellow to white - a sunflower can be transformed into a daisy. By changing the thread colour the visual texture alters the flower; smoothly stitched free motion lines make a gentle, delicate flower, whereas bold embroidery stitches make for a vibrant, flashy bloom. There is lots of room to experiment and try new ideas.

If you would like more information on this and other workshops, please click here


I hope you have enjoyed seeing the fun we all had this week. 
Thanks for reading.
​

Please feel free to share my website or blog with your friends by using the buttons to the right. If you would like to receive an e mail each time I post a new blog, please click here. I promise to never send you junk or give your address to anybody else.

A wonderful weekend at the Dorset Quilters Regional day Regional day & workshop with Hardy Quilters

11/10/2015

 
Picture
Picture

​I have just spent a lovely weekend surrounded by all things 'quilt'. My thanks and congratulations to Maureen Rhodes and her team who organised the very successful Region 4 day at Hamworthy Club, Wimbourne. I had the pleasure of giving the afternoon talk to the members of this large region - and was overwhelmed by the warm reception I received.
During the morning we listened to a superb talk by the very talented Gwyneth Rose give her talk 'Always read the instructions'. Gwyneth shared lots of images of her fabulous work with felt and rust as well of many of the quilts she has made. She also made us all laugh as she shared lots of personal stories from her life - and explained to us how she finally became a teacher - something she had always wanted to be!   To see more of Gwyneth's work do look at her page on the Guild website by clicking here, and if you ever have the chance to go and see Gwyneth's work or hear her speak - don't hesitate to go.
Picture
Gwyneth Rose
Picture
 
The following day I had the pleasure of teaching the workshop 'The ones that got away' to some of the ladies from Hardy Quilters. We had a fabulous day together in Osmington village hall - made even more special by the selection of freshly baked cakes which several people brought. We even had one which was baked while we worked.  Now that is what I call multi-tasking!

​

​Since everyone at the workshop was already an accomplished quilter the quality of the finished work was excellent and lots of ideas were explored.

Thank you to Maureen, Liz, Birgitta, Chantal, Ann, Del, Sheila, Diane, Maureen, Liz, Barbara, Alison and Steve for a great day.
​

​
Here are some pictures of the day as it unfolded
Lunch  was followed by...... more cake!
Picture
There was delicious flapjack for the morning session too - but unfortunately I ate it before taking a picture. Sorry.
Exploring layers of transparent fabrics and different colour choices
Picture
Picture
Picture
Picture
Some of the s​emi-finished pieces

​I hope you have enjoyed seeing the fabulous work the ladies of Hardy Quilters created. It was a great day with lots of experimentation and exploration with the techniques of faux trapunto, free motion quilting and the layering of transparent fabrics. Thanks, ladies. I would love to see your pieces when they are finished.
​
Please feel free to share my website or blog with your friends by using the buttons to the right. If you would like to receive an e mail each time I post a new blog, please click here. I promise to never send you junk or give your address to anybody else

Thanks for reading

Do you doodle?

25/5/2015

 
Yes! I am a doodler. Are you? 
If I am sitting on the phone and there is a  pen and a piece of paper near me something happens - and by the time I have hung up whatever the paper was is covered in scribble. Sometimes it causes trouble. 

"What happened to the water bill?" was the last difficult question I had to answer this week. What had once been just a water bill was actually now a piece of blue biro artwork. Normally this would not have been a big problem - but when you want to open a bank account and have to go to the bank with the all important ID documents, you know - passport and a utility bill ..... which is now covered in my spontaneous drawings .................


Trouble is not far away.


So - now I will try to be more selective in my doodling material - but still, sometimes accidents do happen.

Picture


Etymology
The word doodle first appeared in the early 17th century to mean a fool or sitmpleton. It may derive from the German Dudeltopf or Dudeldop, meaning simpleton or noodle.


Doodling v Drawing

Let's just clear one thing up.
Doodling is not the same thing as formally drawing. 
A doodle is a drawing
 made while a person's attention is otherwise occupied. So, if I sit down and focus on just drawing, then that is a drawing.  To be a doodle I am drawing, but not really thinking about it.


Picture


Doodling has a bad reputation

Now - when I was in school, doodling was severely frowned upon as being a waste of time , or even worse, proof that you were not concentrating. How wrong they were!!! Recent studies by Professor Jackie Andrade, of the School of Psychology at the University of Plymouth have come to my rescue and give scientific proof (obviously the best kind) that doodling is NOT the product of a wandering mind, but, in fact, the complete opposite! Doodling is not my mind 'daydreaming' but rather a way to force it to stay focussed on the present.
In fact, much like chocolate and red wine, doodling has benefits. Who knew?


So what, exactly, are these benefits? 


Picture
I liked this one so much I painted it afterwards
Doodling increases creativity
When we process information and turn this into learning  there are several 'ways' or 'modalities' our brains like to use. Here are the most common; auditory, kinesthetic, visual, reading, writing. Each of us has our preferences. My brain learns best from images and doing things. Have you ever thought about how you like to learn before? 
It is believed that if we are to really learn and assimilate new information we need to engage at least two of these modalities at the same time - or one modality and an emotional connection (sounds complicated.... but it really isn't)
Anyway, the great thing about doodling is that is that it uses 3 of these modalities straight away!

  • Visual, because we seeing what we are drawing
  • Kinesthetic, because we are using our hands to draw
  • Auditory, because we are processing information by listening to what someone is saying to us


Doodling improves your focus and concentration
Often people think that doodlers are daydreaming, with the mind wandering off somewhere.  However, Professor Jackie Andrade has been found that the act of doodling actually reinforces the brain to pay attention instead of drifting off.  Sunni Brown, an eminent doodler who has made a business out of teaching big businesses the benefits of doodling, states that the act of doodling itself, drawing shapes and symbols, actually forces the mind to slow down and focus on the present. (Nice work if you can get it, Sunni!)


Picture
Picture
Must have been a pretty frustrating phone conversation
Doodlers have better memory
Back to Professor Jackie Andrade again. She found that doodlers recalled facts 30 percent better than non-doodlers.   You can read more about the study here. 
The bottom line is that process of doodling helps us remember things better because it brings the information currently being absorbed into a more saturated and sensory experience, allowing a clearer picture of the facts in our memory. 


Doodling helps you see the big picture
According to philosopher Jesse Prinz, who is a professor at City University of New York, doodling helps you hit the sweet spot in your brain, the spot where you are paying close attention but you are not overthinking things.
Sometimes when we are too focused on something, we overthink things, especially the little details that often don’t matter.  As a result of focusing on the small details, we fail to see the big picture.  By doodling, we don’t pay as much attention to the small details of the information we absorb.  Instead, we tend to focus on overarching ideas, which are paramount to seeing the big picture.


Picture
I have no idea what sparked this off!
Doodles and Quilting

With all this free 'inspiration' to hand I think doodles lend themselves to free motion quilting patterns very nicely. As an experienced doodler I have lots of material to put my hands on. Stuck for a FMQ pattern? Put on your favourite music and sing along. Or maybe phone a friend and have a natter - but do it with a pen in hand and a pile of scrap paper (no water bills please).  Just let your hand do what it likes and I will bet that you will come up with something that you could turn into a free motion quilting pattern.  Here are the two doodled pages that I used on my Heron on the Vlei and Flamingoes on the Vlei quilts. There; more proof.


These two pages of doodles became the background FMQ design for my 'Modition' series of quilts


Doodle Birds


Which brings me on to my latest project: Doodle Birds. I am actually revisiting a technique which I tried out about 5 years ago, early on in my ventures into Free Motion Quilting. I decided I wanted to get better at FMQ - and there is nothing like a bit of practice to see improvements. It all began with a doodled bird.................... and this is where I have ended up. 


Picture

It takes time and patience to create a Doodle Bird, but it has improved my FMQ enormously. If you think you would like improve your FMQ then why not give one a try? I will be teaching a workshop at Midsomer Quilting in Somerset on 14th November, but why wait? Get out a pen and some scrap paper, phone a friend and go for it! What have you got to lose?

For more info on the workshop click here.


Please feel free to share my website or blog with your friends by using the buttons to the right. If you would like to receive an e mail each time I post a new blog, please click here. I promise to never send you junk or give your address to anybody else.

'The ones that got away'  art quilt workshop at Midsomer Quilting

18/5/2015


I have just spent a fantastically fishy weekend in Somerset teaching 'The ones that got away' to 14 lovely ladies. Thanks so much to all at Midsomer Quilting for inviting me to teach there.


Thank you to Jilly, Trudy, Chris, Helen, Sue, Penny, Lauraine, Tracey, Pauline, Dee, Lisa Maggs, Margaret and Jan. You all worked incredibly hard and the fish looked fabulous!


Thanks, too to Birgitta for all her help and to De for ordering all the fabrics and materials that helped the day run so smoothly. 

Picture
'The ones that got away'

Here are some pictures of the great work in progress. 
The techniques we used included:
fused raw edge applique
using soluble thread
machine trapunto

free motion quilting
layering transparent fabrics

cutting away fabrics to reveal lower layers
creating a net from thick thread

The workshop was quite intensive, and we didn't manage to complete the whole quilt in a day, as I had hoped. But everyone had a great time, and people who had never stitched free motion quilting before all had great success in stitching the scales onto their fish. It is always such a pleasure to see people learn something new.


If you are interested in finding out more about this workshop, why not take a look a the brochure?  You can download it here.


If you have any questions about the workshop or want to leave a comment, please do!
Picture
Thanks so much for looking!
Claire


Please feel free to share my website or blog with your friends by using the buttons to the right. If you would like to receive an e mail each time I post a new blog, please clickhere. I promise to never send you junk or give your address to anybody else.

New quilt for a course next year

18/7/2014


'The ones that got away'         Midsomer Quilting, May 16th and 17th  2015

Picture

The original version of this quilt, 'Sardine Run', was on display at Radstock Museum earlier this year. Following lots of very nice feedback from visitors, Chris from Midsomer Quilting has asked me to run two one day courses next year, teaching the techniques I used to make it.

Given that the original quilt took a few weeks to make, I decided to design a smaller version for the courses that can be completed in one day. I don't know about you, but generally, when I go on a course I feel much more satisfied when I know I have something that is mostly completed. Obviously it depends on the type of course, but for me, what turns a good course into great one is knowing I have learned as many new skills and techniques as I need to finish the piece of work. 

 With this design my aim is that you will go home happy!
 If you would like to learn the techniques I used to make this quilt then please contact De*** at Midsomer Quilting on 01761 239333  to book your place.  

I look forward to seeing you.

***De has very kindly offered to put together a kit with small pieces of a variety of suitable fabrics and other embellishments should you wish to purchase that. It might work out to be more economical to buy the kit as you need  a lot of small pieces of net, organza, cotton fabric etc. Speak with De for more details closer to the date of the course if you wish to have one.***

click here for brochure

Read More
    Picture
    Picture
    Picture
    Picture


    Click here if you would like to receive an e mail when I add a new blog post.
                       OR

    Follow my blog with Bloglovin
    Picture

    Categories

    All
    Challenges
    Classes
    Colour
    Cool-ideas
    Courses
    Designing
    Doodling
    Dye
    Exhibitions
    Experimenting
    Festival-of-quilts
    Flower-bowls
    Gelli-plates
    Hanging-sleeves
    How-to
    Inspiration
    Line
    Lino Blocks
    Making
    Marbling
    Mending
    Mono Printing
    Mosaic
    New-products
    Purchasing
    Quilt Gallery
    SAQA
    Sew On The Go
    Sketchbooks
    Software
    Stencils
    Stitch
    Surface Design
    Talks
    Thread
    White Horses
    Workshops
    Yarn Bobming

    Archives

    December 2020
    September 2020
    August 2020
    July 2020
    May 2020
    February 2020
    December 2019
    October 2019
    September 2019
    July 2019
    May 2019
    March 2019
    February 2019
    January 2019
    December 2018
    November 2018
    September 2018
    August 2018
    July 2018
    June 2018
    May 2018
    April 2018
    March 2018
    February 2018
    January 2018
    December 2017
    November 2017
    October 2017
    September 2017
    July 2017
    June 2017
    May 2017
    April 2017
    March 2017
    February 2017
    January 2017
    December 2016
    November 2016
    October 2016
    September 2016
    August 2016
    July 2016
    May 2016
    April 2016
    March 2016
    February 2016
    January 2016
    December 2015
    November 2015
    October 2015
    September 2015
    August 2015
    July 2015
    June 2015
    May 2015
    April 2015
    March 2015
    February 2015
    January 2015
    December 2014
    November 2014
    October 2014
    September 2014
    August 2014
    July 2014
    June 2014
    May 2014
    April 2014
    March 2014

    RSS Feed

    Picture
    Picture
Powered by Create your own unique website with customizable templates.