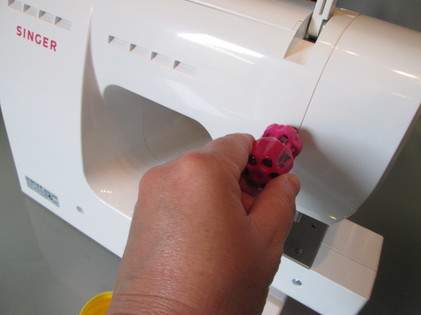
I had a funny half hour this week. I was quilting a new piece of work and all was going well. But very gradually a small squeak began. Nothing much, just a little noise. So I ignored it and carried on. Probably not the smartest thing to do, but I had a nice rhythm going and I didn't want to stop. Slowly the squeak became louder and louder until I realised that it wasn't going to go away, and in fact, I might be doing some serious damage to the machine. So I stopped and did the (almost) right thing.
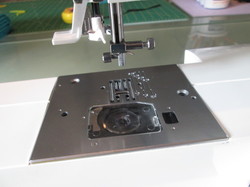
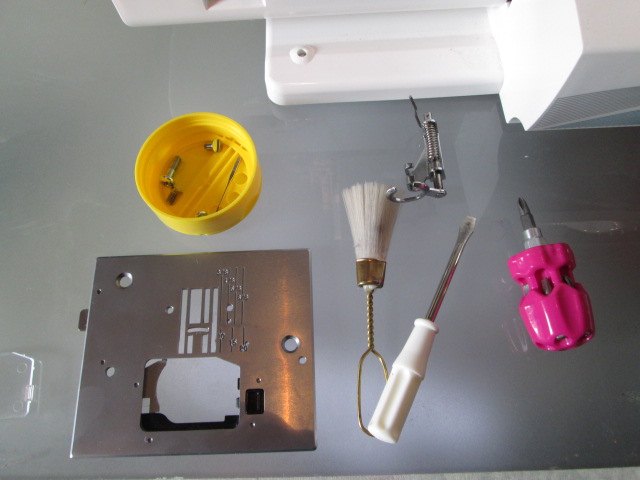
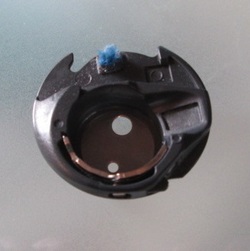
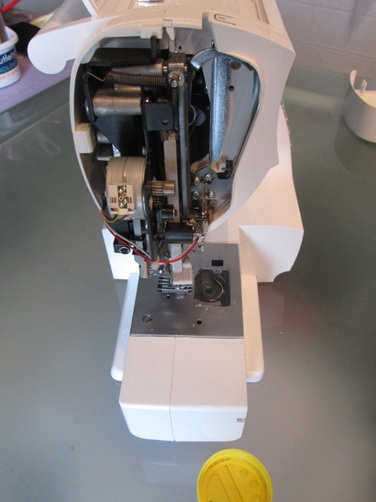
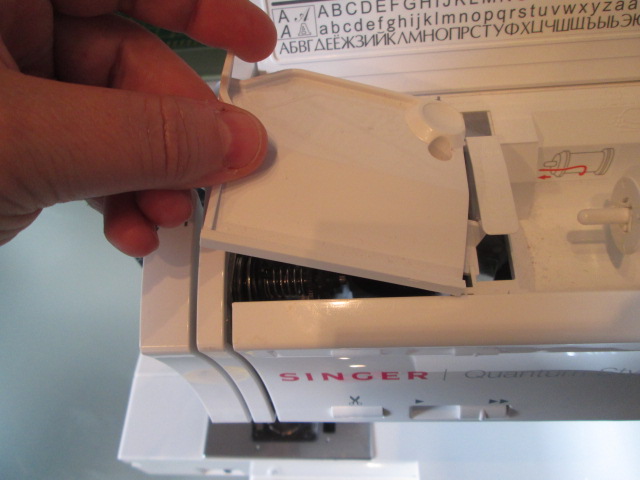
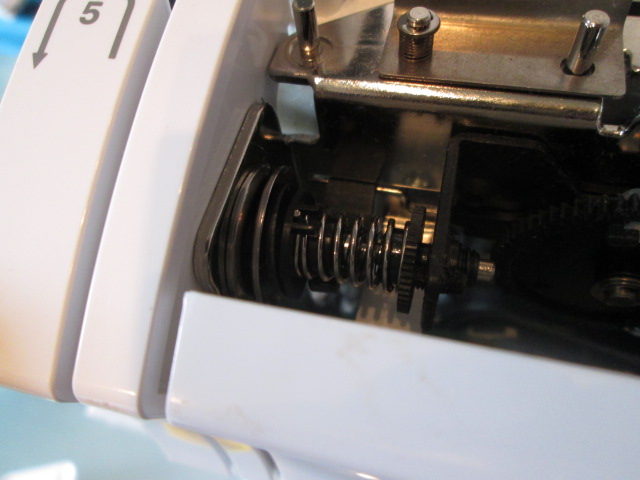
Starting in the bobbin zone
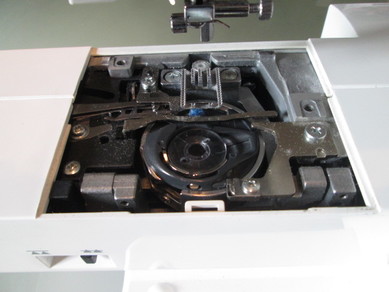
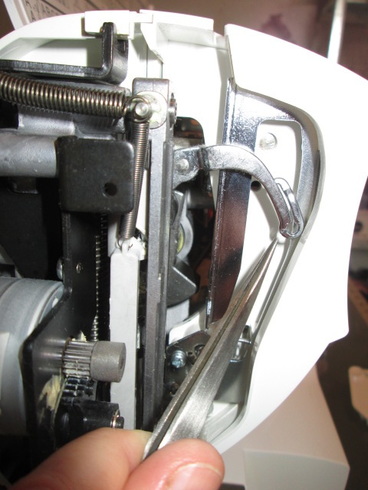
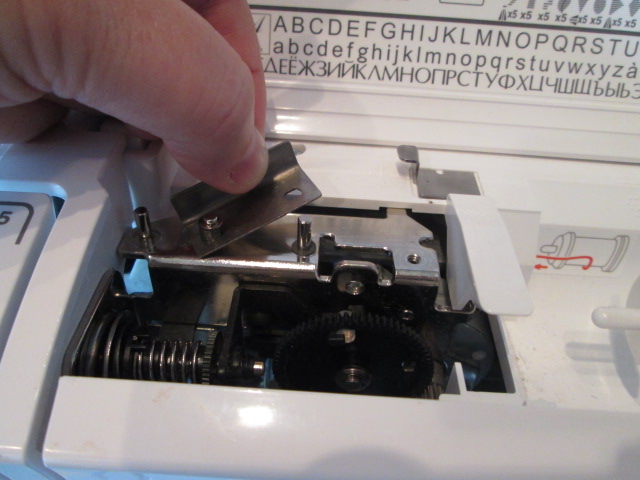
Moving on up to the sewing head
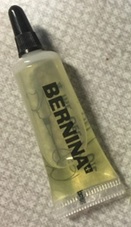
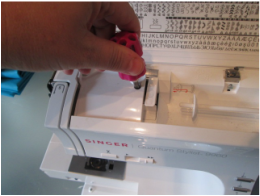
Once I had checked that the mechanism was moving up and down freely I replaced the needle and presser foot and plugged it all back in again. To make sure no residual oil would make a mess I stitched onto a piece of scrap fabric for a few minutes - and guess what.............. the squeak was gone! Da da!!
Thanks for reading.
As well as keeping busy trying new ideas and creating things, it is also good to keep up with all the fantastic work that is being made and exhibited by so many other talented artists. However, I do sometimes difficult to keep track of 'what's on when', so I have been searching around to find some great exhibitions to visit in my first month back in the UK. Here are a few that have caught my eye.......... it looks like I won't have time for anything else!
Dorset Art Weeks: Textile Exhibits 28th May to 12th June 2016
Fracture: prism textile group 1st to 12th June 2016
A Child of the Sixties: Threaded Together
2nd to 23rd June 2016
Lady Sew and Sew Warehouse, Farm Road, Henley on Thames, Oxfordshire RG9 1EJ
On The Edge: Contemporary Quilt Group of the Quilter's Guild of the British Isles
4th to 11th June 2016
The Bramble Patch, West Street, Weedon, NN7 4QU
Brunel Broderers: New Worke
8th June to 11th July 2016
Bucks Open Studios: Textile Exhibits 11th to 26th June 2016
Making Space: 62 Group of Textile Artists 17 June-3 September 2016
Unfolding Stories 2: Contemporary Quilters West
24th June to 5th July
So, if you happen to be in the South West in the month of June you certainly have plenty of opportunities to see some wonderful textile art. I am amazed and delighted at the amount of work there is going to be on show. I guess it demonstrates how popular textile art has become.
If you notice any errors, please do let me know, and if you have information you would like me to add to this list, please get in touch and I will happily add it. Thanks for reading.
I met a lovely group of very accomplished traditional quilters this week. We spent a great morning together eating cake, swapping stories and sharing our work. It was a pleasure to see such beautifully made quilts. It always makes me smile, but the world over, quilters always seem to ask the same questions...
'How long did it take to make?'; 'Where do you get you ideas?' and 'How do you turn the ideas into quilts' being the top three that seem to get asked most often.
A quick Google search brings up lots of videos, online courses, tutorials, books, and tips for those who would like to make the transition to designing and making their own work. If you want to get technical you can get into the detail of good design and like many other quilters I have written a book about it. One of the main things to do is to stop wondering about it and take the plunge. Try something small and don't worry if it doesn't work out. But that still doesn't answer the question, does it?
So, here is one quick and easy technique to at least get started, and once you have started it will all seem a lot easier! Find something that you like. It might be a picture, a cushion, your auntie's old tea towel, or maybe a quilt that has particularly caught your eye. It can be anything. You aren't going to make a copy of it - so no need to fret about copyright. (However it might be polite to ask the permission of the original maker if you think it appropriate.) This is going to be your inspiration and you are going to look at it carefully and ask......... 'what if ?' To demonstrate what I mean, here are several quilts made using the quilt 'City of Roses' (a quilt I made several years ago) as the starting point and the 'What if ?' questions that I asked. What if................ I changed the colours? This is a pretty straightforward and not terribly original, but it is a good place to start this explanation. (note: if you are only changing the colours of a quilt then you really do need to ask the permission of the original maker, as it is a copy). So, instead of green and pink I chose blue & purple and peach & pink. Already it is starting to look different. (I will be teaching this quilt and many options for altering it at Midsomer Quilting on 3rd July) What if.............................. I modified the shape of the flower motifs? In my sketchbook I tried several different ideas for the rose shapes. There are lots of different variations that could be made. I stuck with roses, but I could have easily changed the type of flower to something like a daisy for a really different look. I decided to change the way I cut the spiral. Instead of a simple straight edged spiral I made the edge bumpy. What if ....... I changed the way I put the flowers onto the quilt top? Instead of using raw edge applique I thought about how else could I put flowers onto the fabric. I made a lino cut stamp and also experimented with Derwent Inktense pencils and mono printing What if............. I add some leaves? Just a few little green leaves add enough contrast to help define the rose shapes on the busy background. They act as visual cues to say 'we are flowers' and stop the rose spirals from appearing as a big scramble. What if....................... I changed the background? As you can see from the quilt below I made quite a few changes to the background. You can read more detail about how I made this quilt in an earlier blog post by clicking here, but basically I cut the quilt into 3 and inserted panels of white fabric in between. On the white fabric I wrote a message with dye to tell the story I wanted to convey.
At a glance this quilt looks quite different from the original, but if you look more closely you will see it shares many similarities with 'City of Roses'. There are changes to the size, colour, overall shape of the quilt, as well as a slight change to the flower motifs and the method of adding the flowers. All this has contributed to making this a new and unique design.
What if...................... I simplify the quilt?
Instead of having 3 central panels - how about making it smaller and just having just one? Alternatively how about making it larger and having 5? What if ................. I change the colour of the text? Rather than have black and grey, what would it look like if I had black and rose coloured text? The answer turned out to be YUK!! Oh well, sometimes these things happen and when they do you get to try another 'what if ?' to solve the problem..... What if ................. I change the colour of the white outer fabric? To quieten down that bright pink writing that was now shouting out I tried painting some weak blue and green dyes onto the fabric. It calmed it down a lot and I like the new look. What if .................. I change the position of the band of appliqued roses? To be honest, this happened by accident, but is nevertheless another good example of a 'what if !' When I fused on the flowers I did not notice I had the quilt upside down, but rather than pull them all off I stood back and looked at the quilt to see whether I liked it or not. I liked the new position - so they stayed and were stitched down. Do you notice that the central panel isn't completely square in this one? That would be another good avenue to explore -perhaps trying a parallellogram or trapezium shape instead of the square. What if............... I added a big extra border? The blue outer border made me wonder whether another border might look good - giving a much more traditional look to the quilt.
Looking at it now I am thinking what if I extend the flowers across the blue border? I might lay a few on to see how it looks.
What if.............. I took the text away and replaced it with some quilting lines instead? For this one I free motion quilted thorny rose stems and leaves and then added a little colour with Derwent Inktense pencils. It has given a light and delicate look which I like very much. What if................ I change the quilting pattern? Instead of the straight line quilting I used a micro stipple to fill the gaps between the leaves. I think this one might be my favourite! That pretty much explains how I approach the whole 'What if' idea, and it has yielded some interesting results. Thanks for reading.
It was another glorious autumn day today, and although I had lots of things I needed to stitch I just couldn't stay inside - so took a few hours and drove into the Kaimai Mountains to enjoy the spectacular colours on show.
The colour of all the trees around the lake was incredibly vivid, but on the shaded valley sides the tree ferns were very different; such a contrast.
It is so different from what I am used to, seeing such different types of vegetation growing in such close proximity.
Once back at home I decided to use the photographs to create some interesting colour palettes. I love to do this and keep a sketchbook just for this purpose. It is such a simple thing to do and is a really useful resource that I refer to often when deciding on how to combine colours for my work.
Why not have a try?
Thanks for reading.
I hope you will be as pleasantly surprised with the results of the avocado dyeing experiments I did last week. You can see the results below. After soaking overnight in the dye bath, I laundered the fabric and the result was a beautifully soft dusty pink (it is the fabric in the centre). The other wonderful thing is the fabric had the most lovely smell - a slightly perfumed citrussy freshness. I wish I could bottle it!
I think the 3 fabrics below look beautiful together don't you? - The original white, the avo dyed fabric and then the walnut dyed fabric I made a few months ago. Adding the iron after mordant
If you have ever tried working with indigo or wode then you will know about the magic that happens once the fabric comes out of the vat - well, a similar thing happens with avocado dyed fabric once it hits the iron after mordant. It is like magic!
I think the best way I can show you what happens is in pictures.............. I decided to try a folding technique and dip the dyed fabric into the iron after mordant to see what would happen. I folded the fabric following the instructions in this video https://www.youtube.com/watch?v=eTaAl4us8aY Once it was folded I poured the iron after mordant I made last week into a bowl and briefly dipped the edges of the fabric into it. As soon as I took the fabric out and the air hit the fabric it began to change colour. The whole reaction takes place in a matter of seconds, and the more of the iron mordant you add the darker the fabric becomes. I had not realised quite how strong or quick the reaction would be, and unfortunately on this occasion I think I rather overdid the dip! Still - it was a great learning experience, and next time I will be much more light handed. I have also experimented with other methods of applying the iron water by painting lines and dripping it onto the fabric. There is a lot of opportunity to experiment here.
Sadly the lovely smell is now gone, replaced instead with that curious metallic smell which reminds me of blood (that'll be the iron!) Still, it turned into a pretty interesting piece of fabric.
And to my friend k3n - you are absolutely right - 'saddened' is a very good adjective! (see the comment k3n left at the end of last weeks post) I Hope you have fun if you have a try. Thanks for reading!
|
|