CLAIRE PASSMORE blog

re-forming the hectograph plate

7/3/2014

 
Picture
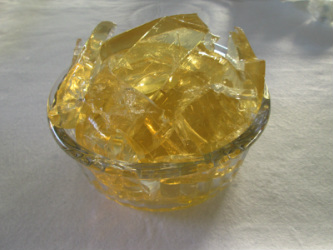
This plate seems to be remarkably strong and resiliant - much more than plates I have made in the past using just gelatine and water. It was easy to wash off after I had finished using it by simply putting it into the sink and running cool water over it. It did not crack or tear and the edges are still very firm. I love it!


However, I decided to take the chance to see how easy it would be to melt it down and reform it into a 'new' block should it begin to break down, rip or split.

Picture
So - I took my lovely new block and ripped it up into pieces. I was surprised at how firm and strong it was. I put it into a glass bowl and popped it into the microwave. 
I heated it for 4 minutes on medium power until it was liquid again.

Picture
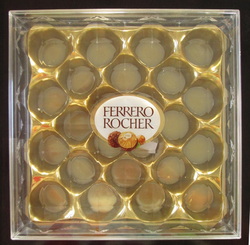
I then poured it into a new container - a slightly smaller and more square shaped plastic box with a removable lid. It once held those little chocolates the ambassador is so fond of! I think it will be easier to store the plate in a box with a lid to keep off dust. Hopefully it will be easy to take the plate in and out of the box for use. I will soon see!

Tomorrow I will begin to stitch some of the squares using the fabrics I made today.


gelatine plate Monoprints

7/3/2014

 
Picture
So here it is - the gelatine & glycerine hectograph plate I made yesterday.
 I did not put it into the fridge overnight as I would normally have done, and so far so good. I did put a piece of cling film over it, however, as I didn't want any dust to settle on it.

DID YOU KNOW???
Gelatine plates used for printing were invented by a Russian man named Mikhail Alsiov in 1869.
The process is more properly known as
hectography and the prints you make are called hectographs.

Making the monoprints
Picture
Picture
Picture
Picture
Picture
1
Ink up the plate with fabric paint using a brayer or sponge roller
2
Wooden laser cut block to remove paint.
3
Press block onto plate and then carefully remove. Don't smudge! 
4
A nice bi-product - a print made by using the wood block as a stamp 
5
Press fabric onto the gelatine plate & then carefully peel off

Read More

GelatinE plate 'how to'

6/3/2014

 
Yesterday I used a hand carved lino block to print onto some hand dyed fabrics for my logo design.

Today I am going to try out a new recipe for a gelatine plate to print from. The great thing about this plate is that it is supposed to last forever. Well, maybe not forever, but this one apparently does not go mouldy and does not need to be kept in the fridge. On top of that, when it starts to get a bit beaten up it is claimed that you can put it into the microwave, melt it and re form it. Surely it has to be worth a try! 

Here are the ingredients:
6 Tablespoons, or 7 packets of gelatine 
1½ cups, or 355ml of water 
1½ cups, or 355 ml of glycerine 

Pour the glycerine into a bowl and sprinkle over the gelatine powder.
Allow the gelatine to become moist and then give it a gentle stir.
Now add the hot water and stir again.
Picture

Picture
It looks quite grainy to begin with, but as the gelatine absorbs the water it will gradually become clear.

TIP: When you stir, try to be as gentle as possible. You want as few air bubbles in the mixture as possible,(unless you particularly want a textured surface). 

Next, line a shallow tray or container with cling film / Saran wrap / Glad wrap and place it on a level surface. Pour the mixture in carefully then use a piece of paper to drag over the surface to remove any little bubbles that will inevitably have got in. 
Allow to set at room temperature.
Picture

Picture
After about 2 hours the gelatine plate will have solidified and be ready to use. 

Tomorrow I am going to try it out! Come back and see how it goes.

surface design on fabrics

5/3/2014

 
Today I am taking some of my hand dyed fabrics and adding some extra visual texture. I love to add texture in different ways - over-dying, batik, printing, embroidery, removing colour....... so many ways. But today I am going to focus on printing and am going to start with  Lino block prints. 

Picture
The tools I use: Soft cut lino blocks, lino cutter & blades, hand guard and wooden cutting board. I also used an old sugar craft flower cutter as a stamp.

I drew two simple flower shapes onto some offcuts of soft cut lino and then used the lino cutting blade to carve away the lino outside of the lines, leaving a raised flower shape on each piece of lino. 
I also used an old sugarcraft flower cutter as a stamp.
Picture
The fabrics I printed with the carved blocks.

Picture
Picture
I used this fabric for the letter E.

For this letter I have chosen to cut out the fabric inside the letter and I plan to fill it with machine needle lace.

Tomorrow I hope to try out a new recipe for making a Gelatin plate for mono printing that will not need to be refrigerated. Come back and see how it goes!

So what am i up to today?

4/3/2014


designing a logo

Picture
Welcome to the first day of my blog....

So what am I doing today? 
I have decided I want to create a banner style logo for my new website, 'EXPERIMENTAL THREADS'

After much thought and playing about I have finally settled on creating a series of 3 1/2 inch squares, each with a single letter from my website name and using a different technique......


Over the next few days I will post my progress and the different techniques I am using.


The letters:

Today I started by printing out the letters I am going to use. 
 I wanted an easy to read font that would stand out from a distance, and give me enough room inside the letters for the fabric to show through any embellishment I add. So I chose the font named Georgia, size 200 in bold.

I printed out the letters onto regular copier paper and cut them up. I a now in the process of pinning them onto the fabric squares.

Picture
3 1/2 " square of hand dyed fabric layered with batting and backing fabric to make a traditional quilt sandwich
    Picture
    Picture
    Picture
    Picture


    Click here if you would like to receive an e mail when I add a new blog post.
                       OR

    Follow my blog with Bloglovin
    Picture

    Categories

    All
    Challenges
    Classes
    Colour
    Cool-ideas
    Courses
    Designing
    Doodling
    Dye
    Exhibitions
    Experimenting
    Festival-of-quilts
    Flower-bowls
    Gelli-plates
    Hanging-sleeves
    How-to
    Inspiration
    Line
    Lino Blocks
    Making
    Marbling
    Mending
    Mono Printing
    Mosaic
    New-products
    Purchasing
    Quilt Gallery
    SAQA
    Sew On The Go
    Sketchbooks
    Software
    Stencils
    Stitch
    Surface Design
    Talks
    Thread
    White Horses
    Workshops
    Yarn Bobming

    Archives

    December 2020
    September 2020
    August 2020
    July 2020
    May 2020
    February 2020
    December 2019
    October 2019
    September 2019
    July 2019
    May 2019
    March 2019
    February 2019
    January 2019
    December 2018
    November 2018
    September 2018
    August 2018
    July 2018
    June 2018
    May 2018
    April 2018
    March 2018
    February 2018
    January 2018
    December 2017
    November 2017
    October 2017
    September 2017
    July 2017
    June 2017
    May 2017
    April 2017
    March 2017
    February 2017
    January 2017
    December 2016
    November 2016
    October 2016
    September 2016
    August 2016
    July 2016
    May 2016
    April 2016
    March 2016
    February 2016
    January 2016
    December 2015
    November 2015
    October 2015
    September 2015
    August 2015
    July 2015
    June 2015
    May 2015
    April 2015
    March 2015
    February 2015
    January 2015
    December 2014
    November 2014
    October 2014
    September 2014
    August 2014
    July 2014
    June 2014
    May 2014
    April 2014
    March 2014

    RSS Feed

    Picture
    Picture
Powered by Create your own unique website with customizable templates.