|
If you went to Festival of Quilts, I hope you had a lovely time. As usual there was lots of excellent work to see, old and new friends to meet, and a hint of controversy too.
My mum and I spent a great weekend together and came away with lots of ideas and a little bit of shopping too. One of our favourite galleries was that belonging to Russian artist Lyubov Lezhanina. (Click on her name for a link to her Facebook page). It was tucked away right in the back corner, so if you didn't get down there, here are some photographs of her wonderful work. And now back to work.... On October 2nd I have a new 'Further Techniques' workshop coming up at Midsomer Quilting where we will be taking a more considered approach to some of the ideas used in the original 'Techniques 1' workshop. The aim of the new workshop is to add surface design to large pieces of fabric in order to create a co-ordinated collection that can be used to create a unique art quilt.
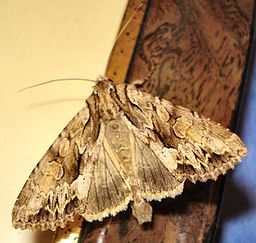
Not only is is an interesting little creature to look at, it is also a very simple shape with some interesting marks which will transfer nicely as a lino block.
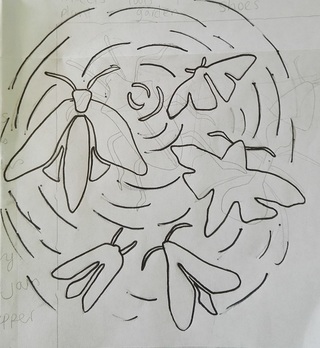
To start the block I made a very simple drawing of the shapes I wanted to carve. You can see that there is no detail here - just the outlines of some vaguely moth shaped creatures and some lines giving the idea of movement. (Please ignore the faint beetle and ant shapes in pencil - this is a recylced piece of paper and they have nothing to do with the moths)
This is what I intend to carve into the piece of 'lino' (I like to use a soft plastic type material as a substitute for lino as it is much easier to cut into and doesn't crumble like lino can if it gets cold or dries out). The moth shapes will remain whole on the block and the lino material all around them will be carved away. Using a very soft pencil I traced the outlines then transferred them onto the lino block, ready to carve. 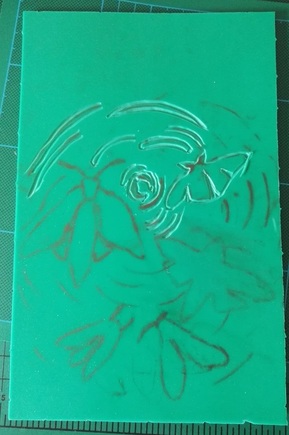
You can see the smudgy pencil outlines of the moth shapes and also see where I have started to carve into the block, taking out the green plastic material with the cutting blade. However, it is already starting to get a little confusing as to what should be carved away and what should remain, so I took a black marker pen and coloured in all the areas I want to stay. That way I hope I wont make any mistakes and carve out a section that should stay. Once it is gone, it is gone and there isn't a lot that can be done! 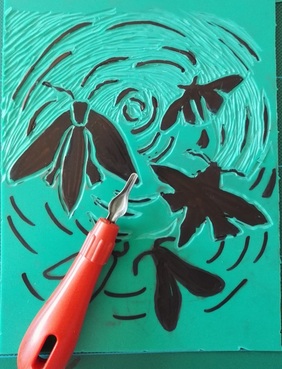
I hope this photo makes it all clearer. The black sections will be left alone for the time being, and all the green areas need to be carved away with the cutting tool. All those little grooves that remain in the carved away section produce beautiful graphic marks on your prints, so don't try and make it all super smooth. SAFETY FIRST: If you try this then you MUST only ever carve away from yourself. That blade is super sharp and not only does it really hurt when you slip and stick it into yourself, it goes in deeply too and there will be a lot of blood and maybe tears. You need quite a lot of pressure to carve into the lino so accidents, which do happen, are not nice. Make sure the hand which is holding the lino block is never in front of the hand holding the carving tool. Although this sounds obvious, it is easy to forget and let that free hand hold the block in such a way as to almost guarantee you will get cut. Turn the lino block often to make sure you are always cutting away from yourself and your free hand. 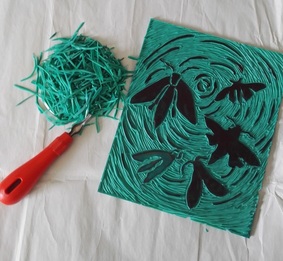
It took about half an hour to carefully carve away all the green material around the black shapes, and the block was ready to have its first trial to see what else was needed to add interest. Using a roller and some printing ink I inked up the block and made a trial print onto a piece of scrap paper. Unfortunately I forgot to take a photo of this very first print, but once I could see how it looked I wiped the block clean with a tissue and carved a little more removing areas where I wanted more definition and where I wanted more detail. This is the print I made next. 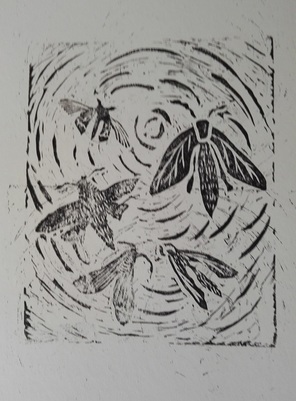
You can see it is not a good print, but the purpose of this one was simply to see how the extra detail I added looked. The moth on the right was looking more like a wasp with the marks I carved into the wing sections - so I knew I needed to cut some more into that area to sort out that problem. But I do like the small straight lines I made in the body of the moth on the left.
After that I made a further trial print. The photo below shows this and the ink and roller I used to ink up the lino block. Again, it is a terrible print, but it showed me enough detail of the marks I had cut into the lino. I still don't like the waspy looking one though. Those lines on the wings are all wrong. I'll have to work on that some more. 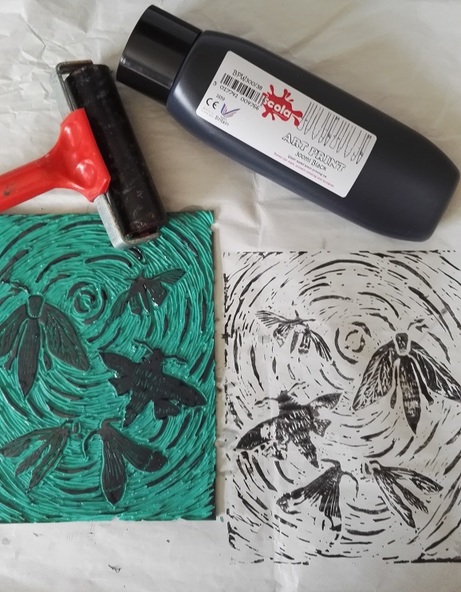
Here is the finished block - still a bit wet after washing off the ink under the tap.
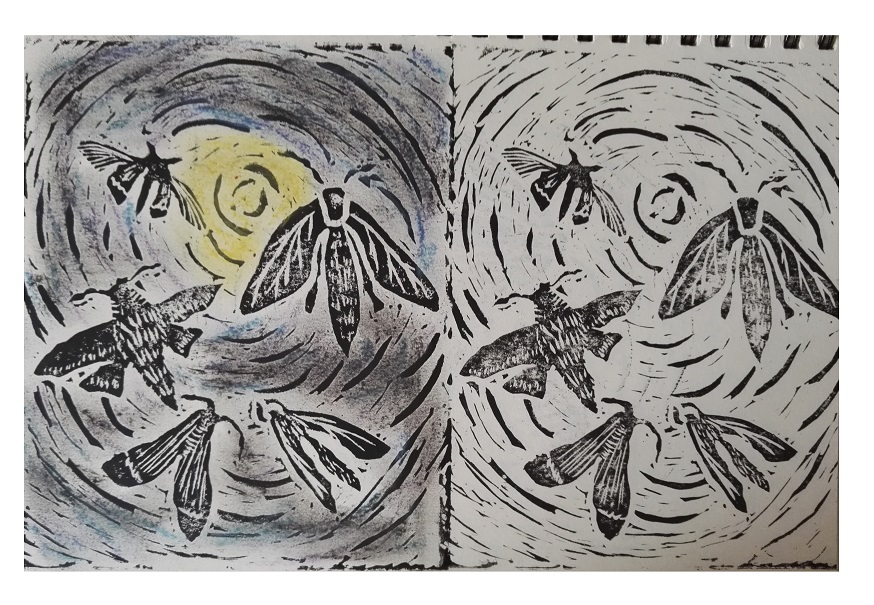
And here are two of the early prints in my sketchbook. I have added a little colour to the one on the left with Markal oilstick. I had intended working onto it with watercolour paint and pencils - but I have discovered that the new ink I have purchased is not permanent once dry and so is pretty useless for my purposes! Aagh!! The moment any water touches the print the black ink smears all over the place and not only ruins the print, but turns everything black. So choose your ink carefully, or use acrylic paint which also works well, and is permanent once dry.
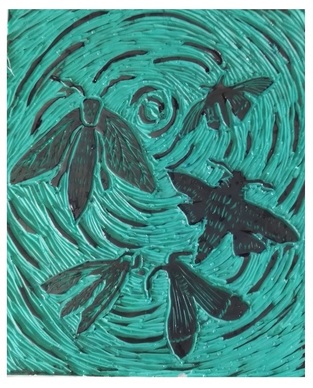
I will work on this block some more, make some better prints and then print up some nice fabric to share in a few weeks time. If you decide to have a try at lino cutting, and it is great fun, please do take care. Put your work onto a non-slip mat or a whole newspaper (to protect your table in case of slips) and remember to keep your free hand behind the cutting tool! Thanks for reading.
Astrid
5/12/2016 03:39:49 pm
Dear Claire,
Hello Astrid 29/10/2017 08:02:22 am
I just couldn't leave your website before telling you that I truly enjoyed the top quality info you present to your visitors? Comments are closed.
|


|